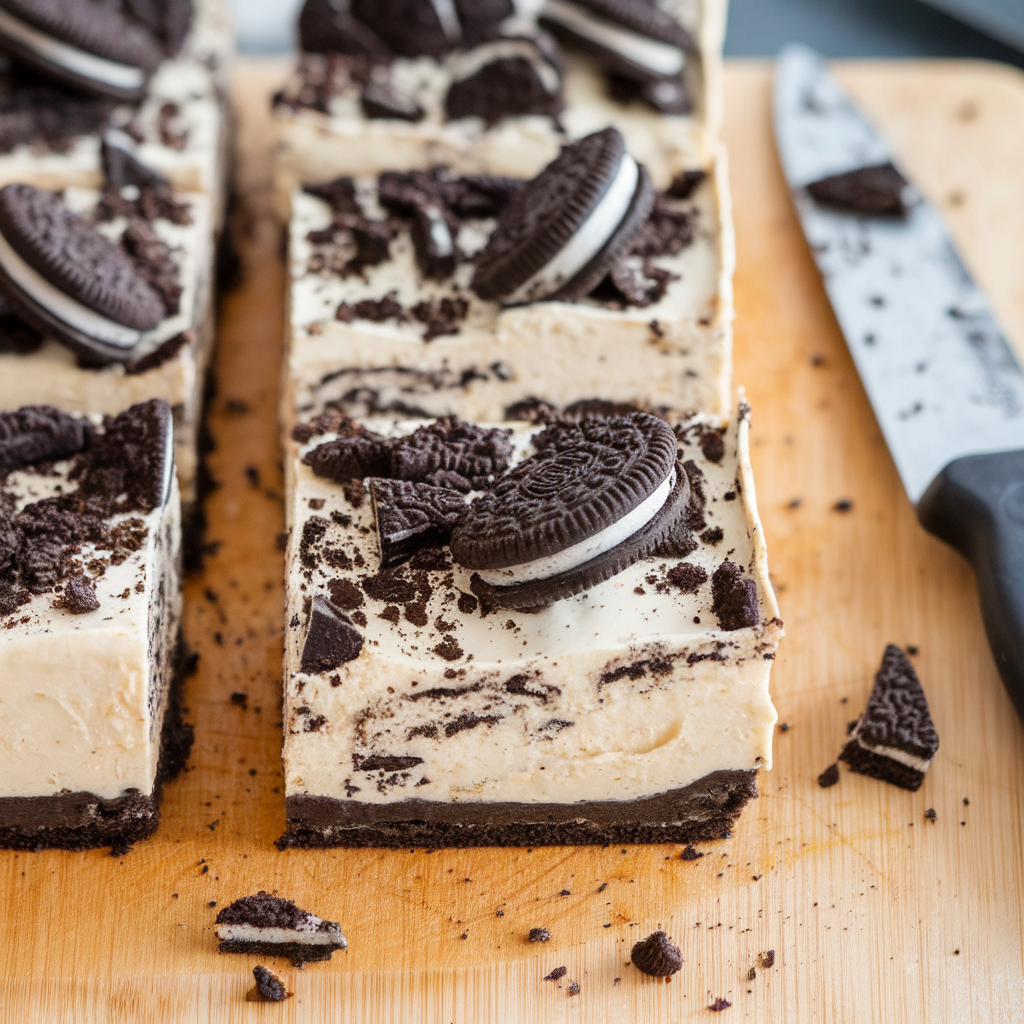
No-Bake Oreo Cheesecake Bars
Hey there, friend! If you’re craving something sweet, creamy, and downright irresistible, these No-Bake Oreo Cheesecake Bars are about to become your new obsession.
Perfect for busy days (or let’s be honest, any day), this recipe is a breeze to whip up and requires zero oven time.
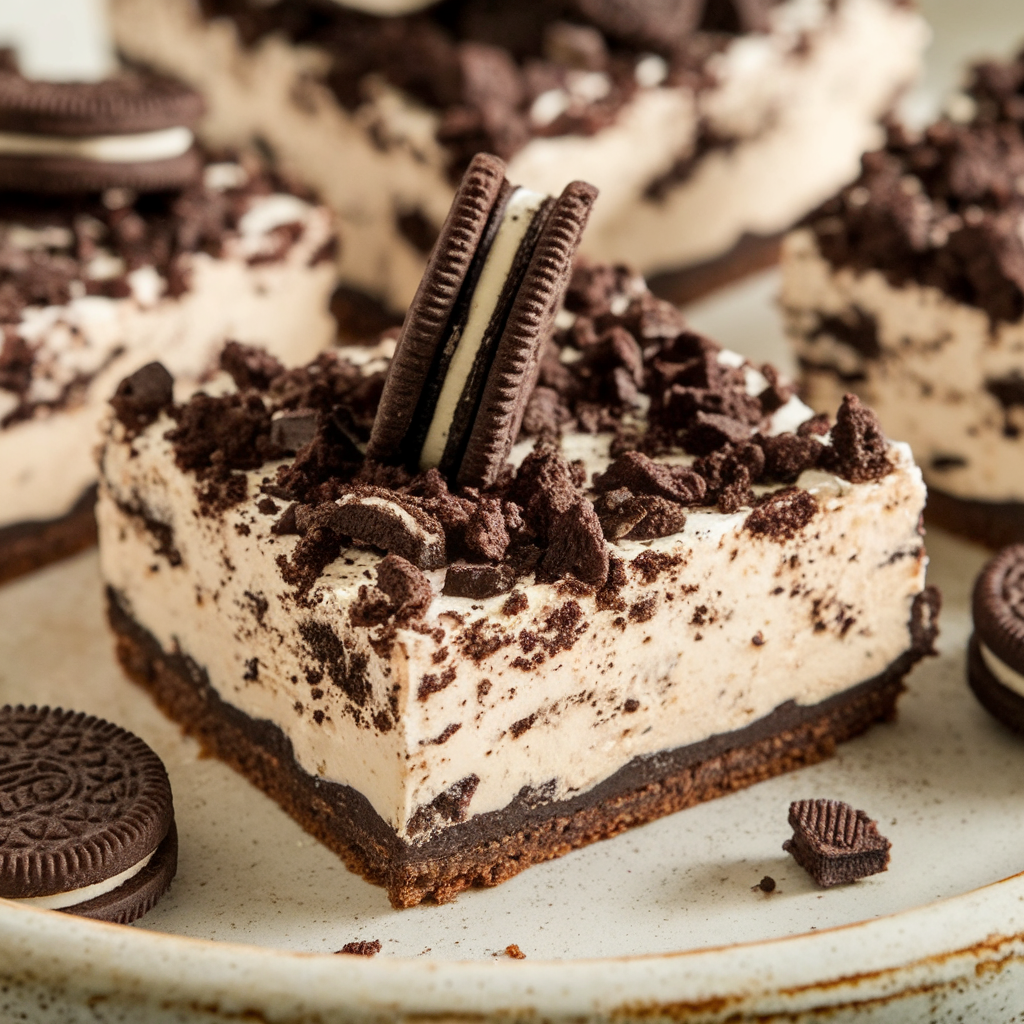
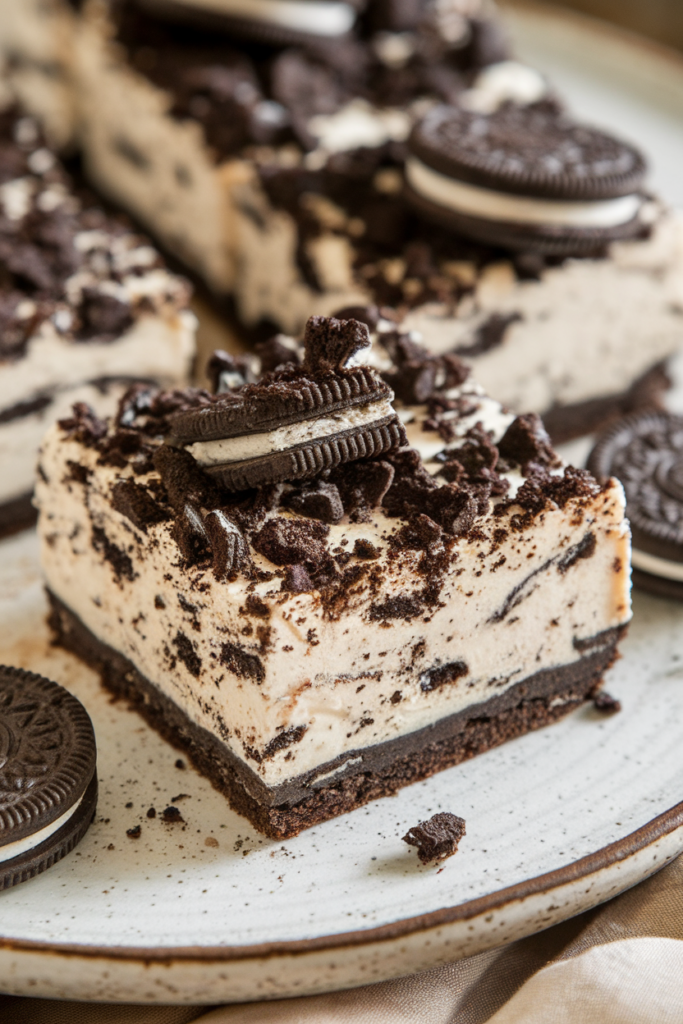
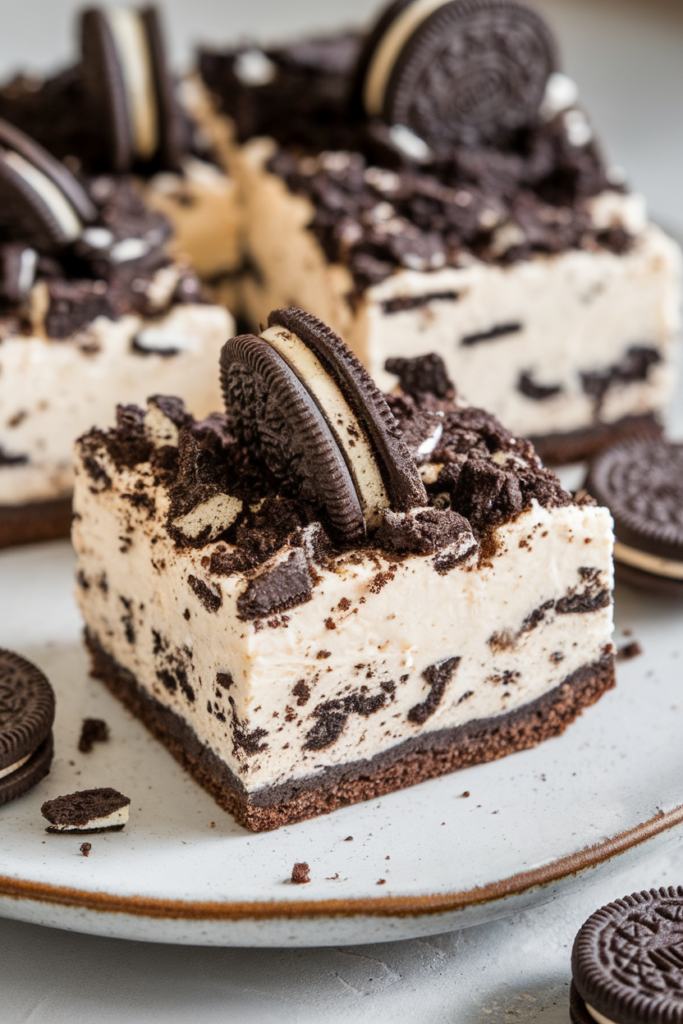
With a crunchy Oreo crust, a velvety cream cheese filling, and a sprinkle of Oreo crumbs on top, these bars are a dreamy dessert that’ll have everyone asking for seconds.
Whether you’re hosting a party or just treating yourself, these bars are guaranteed to bring smiles all around.
How to Make It
Note: This is an overview. See recipe card below this post for ingredient quantities and full instructions.
Step 1: Prepare the Oreo Crust
Start by crushing a generous amount of Oreo cookies into fine crumbs. You can use a food processor for a quick result or place the cookies in a zip-top bag and crush them with a rolling pin for a more hands-on approach. Mix the crumbs thoroughly with melted butter until the mixture holds together when pressed. This will form the base of your cheesecake bars, so make sure it’s well combined.
Step 2: Press the Crust into the Pan
Line a baking dish with parchment paper for easy removal later. Transfer the Oreo mixture into the dish and press it down firmly and evenly using the back of a spoon or your hands. The crust should be compact and smooth, creating a sturdy foundation for the creamy filling. Take your time here—this step ensures your bars hold together beautifully when sliced.
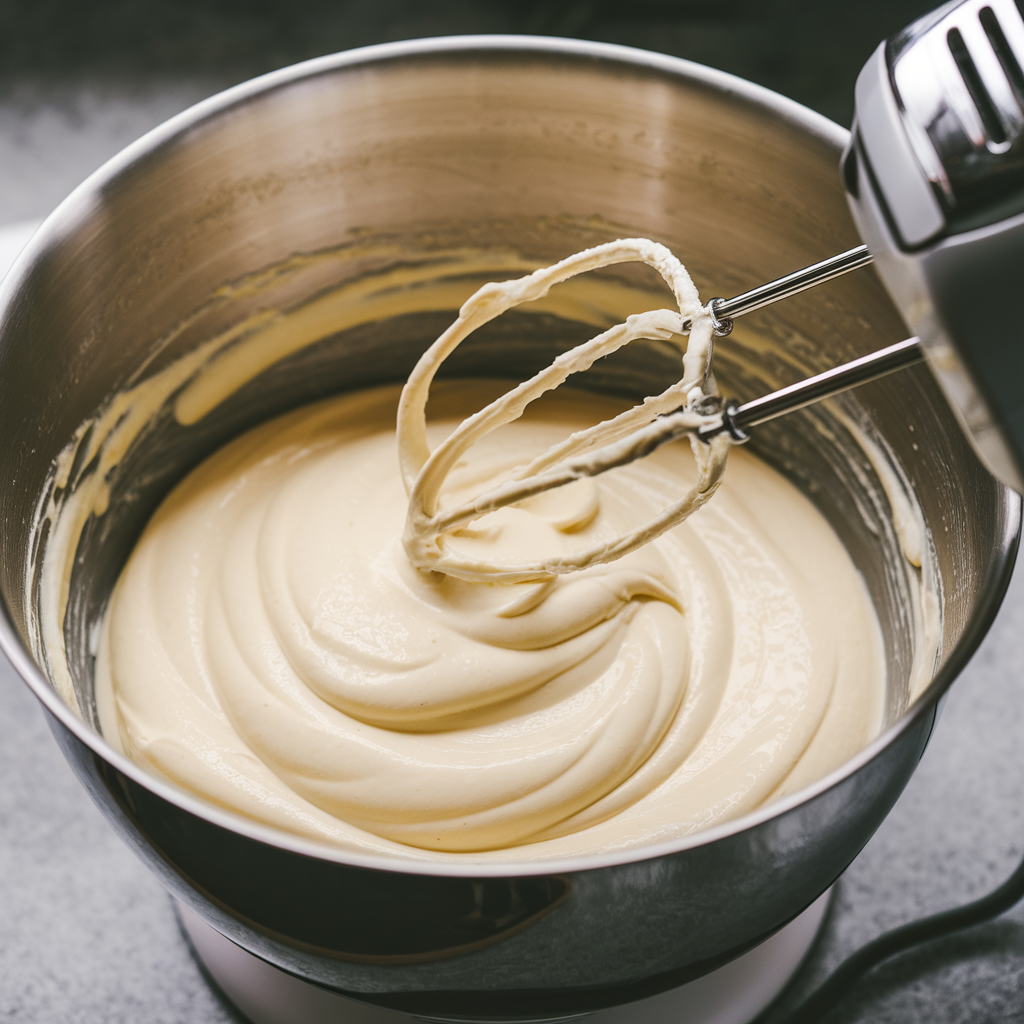
Step 3: Make the Cheesecake Filling
In a large mixing bowl, beat softened cream cheese until it’s smooth and lump-free. Add powdered sugar and vanilla extract, continuing to mix until the ingredients are fully incorporated and the mixture is creamy. For a light and airy texture, gently fold in whipped cream or whipped topping. Then, stir in a handful of crushed Oreos for that extra chocolatey crunch and flavor. Be careful not to overmix, as you want to maintain that fluffy consistency.
Step 4: Assemble the Bars
Pour the cheesecake filling over the prepared Oreo crust, spreading it evenly with a spatula. Make sure the layer is smooth and reaches all the edges of the pan. For an extra touch of Oreo goodness, sprinkle a handful of crushed Oreos on top of the filling. This adds both texture and a burst of chocolate flavor in every bite.
Step 5: Chill Until Set
Place the assembled bars in the refrigerator to chill for at least 4 hours, or until the filling is firm and set. If you’re in a hurry, you can pop them in the freezer for 1-2 hours to speed up the process. The chilling step is crucial, as it allows the flavors to meld and the bars to hold their shape when sliced.
Step 6: Slice and Serve
Once fully set, lift the bars out of the pan using the parchment paper overhang. Place them on a cutting board and slice into even squares using a sharp knife. For clean cuts, wipe the knife with a warm, damp cloth between slices. Serve the bars cold, and watch them disappear in no time!
Pro Tips
- Use full-fat cream cheese for the richest, creamiest texture.
- For a fun twist, add mini chocolate chips to the cheesecake filling.
- If you’re short on time, pop the bars in the freezer for 1-2 hours to set faster.
Storage
- Store in an airtight container in the refrigerator for up to 5 days.
- These bars freeze well! Wrap them individually in plastic wrap and store in a freezer-safe bag for up to 2 months. Thaw in the fridge before serving.

No-Bake Oreo Cheesecake Bars
Description
These No-Bake Oreo Cheesecake Bars are a dreamy dessert that combines a rich Oreo crust with a velvety cream cheese filling, topped with extra Oreo crumbs for a chocolatey crunch. Easy to make and impossible to resist, they’re the ultimate treat for any occasion!
Ingredients
Instructions
-
Line an 8x8-inch baking dish with parchment paper, leaving an overhang on the sides for easy removal.
-
Crush 16 Oreos into fine crumbs and mix with melted butter. Press the mixture firmly into the bottom of the prepared dish.
-
In a large bowl, beat cream cheese, powdered sugar, and vanilla until smooth. Gently fold in whipped cream. Stir in a handful of crushed Oreos (about 4-6 cookies) for extra texture and flavor.
-
Spread the cheesecake filling evenly over the Oreo crust. Top with crushed Oreos.
-
Chill in the refrigerator for at least 4 hours, or until set. Slice into bars and serve.
Nutrition Facts
Servings 8
- Amount Per Serving
- Calories 320kcal
- % Daily Value *
- Total Fat 22g34%
- Total Carbohydrate 28g10%
- Sugars 20g
- Protein 4g8%
* Percent Daily Values are based on a 2,000 calorie diet. Your daily value may be higher or lower depending on your calorie needs.
Note
- For a gluten-free version, use gluten-free Oreo-style cookies.
- Let the bars sit at room temperature for 5-10 minutes before serving for the best texture.
- Customize with different cookie flavors or add-ins like caramel drizzle.
These values are approximate and may vary depending on the specific ingredients and brands used. Always check your ingredient labels for precise nutrition details.