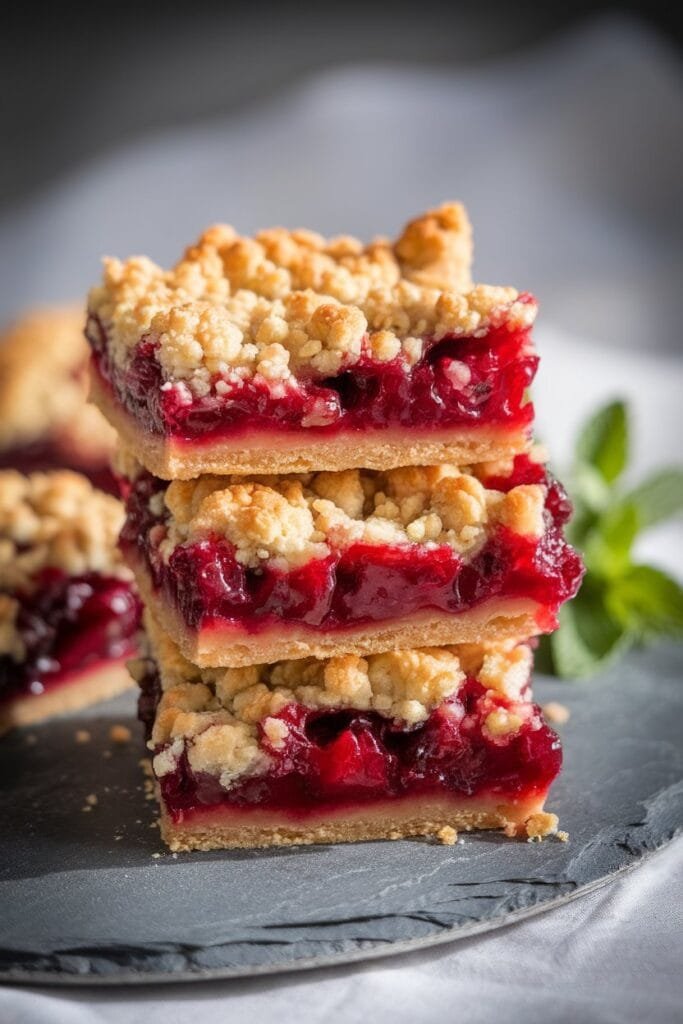
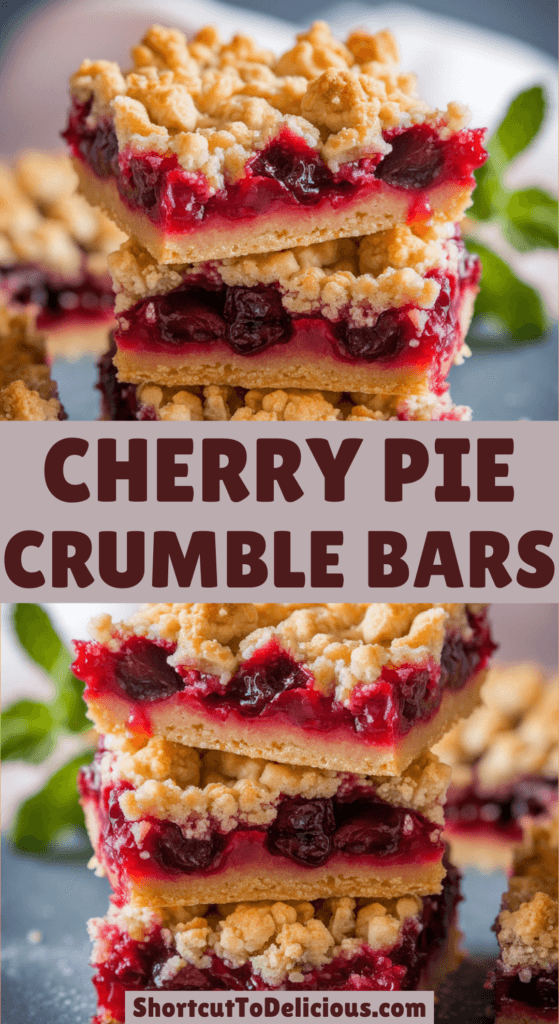
Cherry Pie Crumble Bars
Picture this: a golden, buttery base layered with a juicy, tart cherry filling, topped off with a crumbly, sweet topping that’s just begging to be bitten into.
These Cherry Pie Crumble Bars are my love letter to anyone who wants a dessert that’s big on flavor but short on fuss.
I mean, who has time for rolling out pie dough when you can have all that cherry pie goodness in a handheld treat?
Let’s get baking—I promise it’s easier than convincing your dog to drop that sock he’s been carrying around all day.
How to Make It
Note: This is an overview. See recipe card below this post for ingredient quantities and full instructions.
Mix the Base and Crumble
Start by tossing together a simple mix of flour, sugar, and butter until it’s crumbly and gorgeous. This is your foundation and your topping all in one—talk about a two-for-one deal! Set some aside for later because we’re building layers of yum here.
Press the Base into Place
Take most of that crumbly goodness and press it into a pan to create a sturdy, golden base. It’s like laying down the red carpet for our cherry star—it needs to be firm but not fussy, so don’t overthink it!
Cook the Cherry Filling
Next, simmer those cherries with a little sugar and a splash of something to thicken it up until they’re juicy and irresistible. You’ll know it’s ready when your kitchen smells like a cherry orchard in full bloom—pure heaven.
Layer It Up
Spread that luscious cherry filling over your base like you’re painting a masterpiece. It’s all about even coverage here, so every bite gets that tart-sweet magic—no skimping allowed!
Top with Crumble
Sprinkle the reserved crumble mix over the top like a buttery snow shower. This is where the texture party happens—crisp, golden, and begging for a taste test (don’t worry, I won’t tell if you sneak a pinch).
Bake to Golden Perfection
Pop it in the oven and let the heat work its magic until the top is golden brown and the cherry filling is bubbling up through the cracks. The smell alone will have you dancing around the kitchen—I’m not kidding!
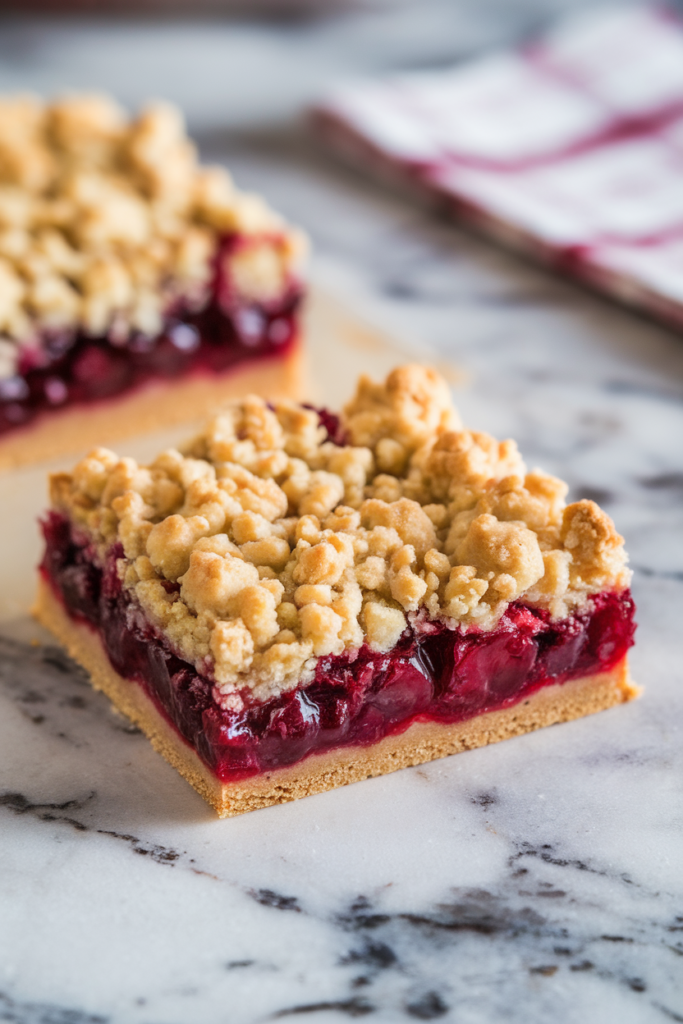
Cool and Slice
Let it cool just enough to hold its shape, then slice into bars. This step tests your patience, but trust me, it’s worth it for that perfect, clean cut that shows off all those glorious layers.
Pro Tips
- Cherry Choice Matters: Fresh or frozen cherries work like a charm—don’t sweat it if you can’t find fresh ones; frozen are just as tasty!
- Don’t Skip the Cooling: Letting these bars chill out a bit before slicing keeps them from turning into a crumbly mess—patience is your friend here.
- Butter is Best Cold: Use cold butter for the crumble to get that perfect texture; it’s the secret to those crispy, golden bits.
- Add a Zesty Twist: Toss a little lemon zest into the cherry filling for a bright pop—it’s like sunshine in every bite.
- Double Up: This recipe doubles beautifully if you’re feeding a crowd or just want extras to stash for yourself (no judgment!).
Storage
- Room Temp: Keep them in an airtight container for up to 2 days—they’ll stay fresh and delicious.
- Fridge: Pop them in the fridge for up to a week; the flavors get even cozier over time.
- Freezer: Freeze for up to 3 months—wrap each bar in plastic wrap and toss in a freezer bag. Thaw at room temp when you’re ready for a treat!

Cherry Pie Crumble Bars
Description
These Cherry Pie Crumble Bars combine a buttery, flaky base with a juicy cherry filling and a crumbly topping that’s pure bliss in every bite. Perfect for dessert, a snack, or impressing your pals at the next potluck!
Ingredients
Instructions
-
Preheat Oven:
Set your oven to 375°F (190°C) and line an 8x8-inch baking pan with parchment paper, leaving some overhang for easy lifting.
-
Make the Crumble:
In a large bowl, whisk together flour, ½ cup sugar, baking powder, and salt. Cut in cold butter with a pastry cutter or your fingers until it resembles coarse crumbs. Stir in vanilla extract.
-
Form the Base:
Press ⅔ of the crumble mixture evenly into the bottom of the prepared pan—use the back of a spoon to make it nice and firm.
-
Cook the Filling:
In a medium saucepan, combine cherries, ⅓ cup sugar, cornstarch, and lemon juice. Cook over medium heat, stirring often, until thickened and bubbly (about 5-7 minutes). Let cool slightly.
-
Assemble:
Spread the cherry filling evenly over the pressed base. Sprinkle the remaining crumble mixture over the top—don’t press it down; let it stay loose and crumbly.
-
Bake:
Bake for 35-40 minutes, until the top is golden and the filling peeks through.
-
Cool:
Let cool in the pan for at least 30 minutes, then lift out using the parchment overhang and slice into 8 bars.
Nutrition Facts
Servings 8
- Amount Per Serving
- Calories 280kcal
- % Daily Value *
- Total Fat 14g22%
- Total Carbohydrate 36g12%
- Dietary Fiber 1g4%
- Sugars 20g
- Protein 2g4%
* Percent Daily Values are based on a 2,000 calorie diet. Your daily value may be higher or lower depending on your calorie needs.
Note
- Cherry Swap: Swap cherries for berries if you’re feeling adventurous—blueberries work great!
- Make Ahead: Prep the filling a day ahead and store in the fridge to save time.
- Crumbly Fix: If the topping feels too wet, add a tablespoon more flour—it should be sandy, not sticky.
These values are approximate and may vary depending on the specific ingredients and brands used. Always check your ingredient labels for precise nutrition details.